Customer Service
August 31, 2023
1386 Views
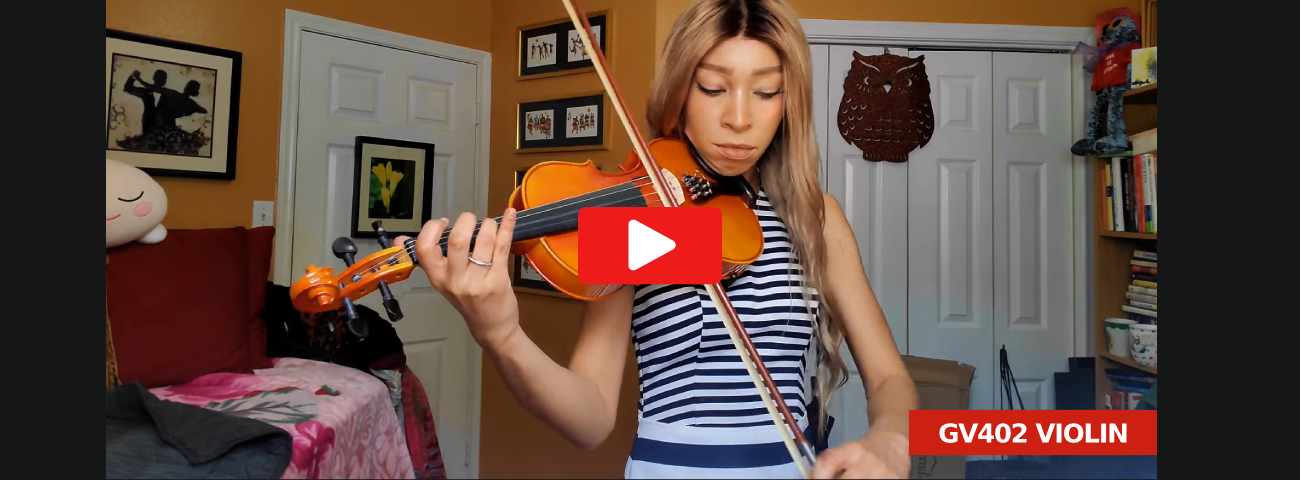
For beginners, it's common not to realize the significance of certain adjustments for a successful start. Click the video above and follow along with gbritaney to effortlessly complete the set up. Learning to set up and play a violin can start with this amazing GV402 violin. With major upgrades in all materials and craftsmanship, it delivers a richer, more refined tone that will definitely surprise you the most.
Check out the violin in the video here: Glarry GV402 4/4 Spruce Violin
More Details
For many beginners, the moment they receive their first violin can be exhilarating. However, the eagerness to immediately draw the bow and start playing often leads to frustration - no sound or off-key notes. What's often overlooked is a critical step: the setup of the violin itself. A few essential adjustments is crucial for a successful start.
So, do you know how to properly set up your first violin? Here's a quick guide to help you through those essential steps:
Step 1: Gather Your Materials
Before diving in, make sure you have everything you need: Your Violin, bow, rosin, shoulder rest and tuner.
Step 2: Rosin Your Bow
Begin by rosining the bow. Take your rosin and gently rub it along the bow's horsehair. Apply enough pressure to transfer a thin layer of rosin onto the hair. This step ensures the bow will grip the strings and produce a clear sound.
Step 3: Tune Your Violin
Tuning is crucial for producing pleasing music. Use your tuner to match the pitches of the four strings to the standard notes: G (lowest), D, A, and E (highest). Adjust the fine tuners located at the tailpiece until each string is in tune. If the strings are significantly out of tune, you might need to use the pegs at the scroll end of the violin to get close to the correct pitch before fine-tuning.
Step 4: Attach the Shoulder Rest
A shoulder rest can greatly enhance your comfort and playing experience. Attach it to the back of your violin and adjust its position to match the natural curve of your shoulder.
Step 5: Adjust the Bow
Hold the bow in your right hand (assuming you're right-handed), placing your thumb on the designated grip area and your fingers lightly curling around the top of the bow. The bow's frog (the bottom part) should be positioned near the winding of the lowest string (G string). Your index finger should rest on top of the bow's stick. Find a balance between the bow's weight and the pressure you apply to produce a smooth sound.
Step 6: Positioning the Violin
Rest the violin's chinrest on your collarbone and support its weight with your left hand. Your left hand's fingers should naturally fall onto the fingerboard. Ensure your posture is comfortable and relaxed to prevent strain during playing.
Step 7: Begin Playing
With the violin set up and in proper position, gently draw the bow across the strings. Aim for a consistent bowing motion parallel to the bridge. Experiment with different bowing techniques to produce different tones. Remember to maintain a relaxed posture and take your time to get used to the instrument.
Congratulations! You've successfully set up your first violin. Remember that learning to play the violin takes time and practice, so be patient with yourself. Regular practice and proper technique will help you progress and produce beautiful music.
Of course, there's one more crucial aspect: choosing the right violin. Glarry GV402 4/4 Violin, designed for beginners as well as professional exams and stage performances, is definitely a choice you shouldn't miss out on. In even more explosive news, it is currently on special for a limited time. Inventory is limited and is on a first-come, first-served basis.
Click here to see the promotional prices: Glarry GV402 4/4 Spruce Violin
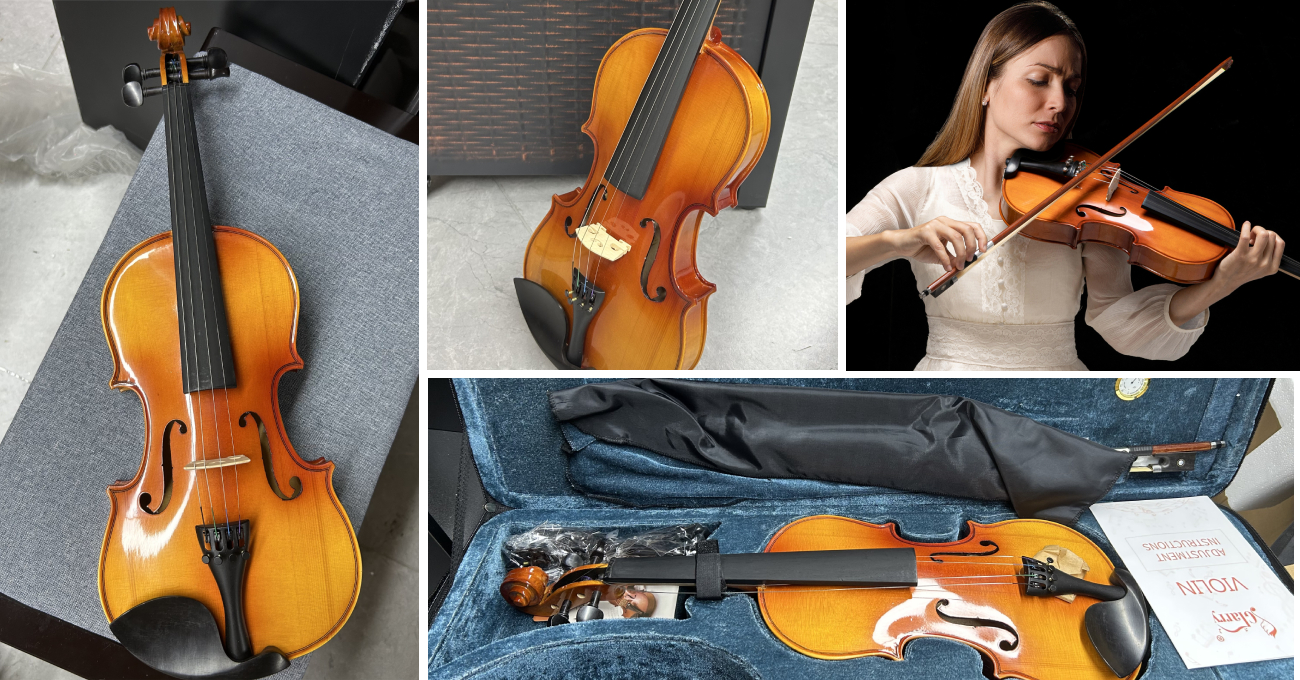
Learn more details: Glarry GV402 4/4 Spruce Violin with 2 x Bow / Bridge
If you have any questions or suggestions, please fell free to contact us. Our email address is: [email protected]. Thank you for your attention!